 |
Friday, April 28, 2017
The Problems With Outdated Oral Care
Some regions in the world, especially in low and middle class communities, receive no oral care or primitive versions of it. One of the most common examples of this issue is dental amalgam restorations. Dental amalgam restorations are a compound of mercury and sliver-based alloys. Mercury had been widely used in dental restorations for about 150 years, until recently in the few past decades when mercury was deemed a toxic material for humans and a contaminant for the environment. However, there are efforts to at least "phase out" the use of this out-dated material and replace it with another material that is as effective and inexpensive. Parts of the body mercury can damage include: kidney, central nervous system and cardiovascular system. Some countries like Norway, Denmark and Sweden have banned mercury amalgam due to its danger to the human body. The European Union plans to ban dental amalgam for children and pregnant women in 2018. The alternative to dental amalgam is composite resin. It is and composed of an acrylic resin reinforced with powered glass filler. Not only is it safe to human health, it is also white and resembles natural tooth color well.
Sources: WHO Oral Health Report, 2003
Wednesday, April 26, 2017
Oral Cancer
Oral cancer is the eighth most common caner for men in the world. In south-central Asia it ranks among the top three most common caners. Denmark, Germany, Scotland, and central and eastern Europe have all reported sharp inclines in the amount of oral/pharyngeal cancers. Austria, New Zealand, Japan and the US have reported inclines, but to a lesser extent. The graph below shows common cancers for males world wide. By studying the graph, pharyngeal and oral cancers are much more frequent in less developed countries.
As I stated in my last post, most of the time the culprit is smoking. However, use of smokeless tobacco and alcohol consumption can also lead to a higher risk of oral/pharyngeal cancers. In Thailand, per 100,000 people, the incident rate of oral cancer is 4.6. This number directly correlates with the amount of people that smoke, chew and drink alcohol. About 60% of people in Thailand smoke, 15% chew betal nut and 35% consume alcohol. India has an even higher incidence rate of 12.6.
Sources:
WHO International Agency for Research on Cancer, 2003
WHO Oral Health Report, 2003
 |
| Comparison of the most common cancers in males in more and less developed countries in 2000 |
Sources:
WHO International Agency for Research on Cancer, 2003
WHO Oral Health Report, 2003
Tuesday, April 25, 2017
Edentulousness and Periodontal Health for Adults Around the World
My last post focused on statistics about dental health for children, but adults especially elderly individuals can suffer from dental issues too. In most cases the solution to a problem tooth is extraction because proper dental care is not available. While one or two teeth may not seem like that big of a difference, loosing teeth can severely diminish an individuals quality of life due to inability to eat basic foods.
Edentulous means lacking teeth or toothless. Below is a table of the edentulous elderly in countries across the world.
Some industrialized countries have seen a decrease in tooth loss among adult populations. However, in some cases percentages of edentulous adults, ages 65 and older, are still very high. Countries above 50% edentulous adults 65 and older include Canada, Albania, Bosnia, Herzegovina, and Malaysia.
Periodontal diseases are also common among adults. 5-15% of some populations suffer from severe periodontitis, which can result in tooth loss. The graph below shows the average percentages of 34-44 year-olds using the Community Periodontal Index. This index has five different degrees of severeness; 0 represents healthy, uninflammed gingiva and periodontium, while 4 represents non-funtional teeth and the most severe form of periodontitis.
More than half of the periodontitis cases in this age group are a result of smoking. In industrialized continues smoking poses as a major threat to periodontal health. Studies have shown that countries with decreased tobacco use have also seen a decrease in periodontal disease cases. When smokes quit the risk of periodontal disease lessens as well.
Sources:
WHO Global Orla Health Data Bank
WHO Oral Health Country/Area Profile Programme, 2000
Edentulous means lacking teeth or toothless. Below is a table of the edentulous elderly in countries across the world.
 |
| Prevalence of edentulousness (%) of elderly reported for selected countries throughout the world |
Periodontal diseases are also common among adults. 5-15% of some populations suffer from severe periodontitis, which can result in tooth loss. The graph below shows the average percentages of 34-44 year-olds using the Community Periodontal Index. This index has five different degrees of severeness; 0 represents healthy, uninflammed gingiva and periodontium, while 4 represents non-funtional teeth and the most severe form of periodontitis.
 |
| Mean percentages of 35-44-year-olds by maximum Community Periodontal Index scores according to WHO regional offices |
Sources:
WHO Global Orla Health Data Bank
WHO Oral Health Country/Area Profile Programme, 2000
Monday, April 24, 2017
Dental Health for Children Around the World
Access to oral care is something most of us take for granted. In many developed and undeveloped countries large percentages of citizens go without proper dental care. Major oral issues include dental caries (cavities) and periodontal diseases. Cavities impact anywhere from 60-90% of children and most adults. The figure below shows cavities amongst 12-year olds from around the world using the DMFT (Decayed, Missing and Filled Teeth) Index. AFRO is African countries, AMRO is American countries, EMRO is Eastern Mediterranean countries, EURO is European countries, SEARO stands for South Eastern Asian countries and WPRO stands for Western Pacific countries.
 |
| Dental caries experience (DMFT) of 12-year-old children according to WHO |
The graph shows that African and Western Pacific countries have a smaller DMFT index, than American countries with the highest DMFT index. A higher index can be a result of increased consumption of sugar and a lack of exposure to fluorides.
More serious oral conditions that plagues children around the world include noma (cancrum oris), ANUG (acute necrotizing ulcerative gingivitis), oral pre-cancer and cancer. Noma is a gangrene of the face typically caused by bacterial infections. It most commonly occurs in young children who are malnourished or suffering from another disease. The figure below shows cases of noma around the world.

Cases of noma involving children ages 3-5 were reported in Africa, Latin America and Asia, 90% of whom died without ever receiving any treatment. Tomorrow I will post about global statistics on oral disease for adults. Stay tuned.
Sources:
WHO Oral Health Programme, Geneva, Switzerland
WHO Global Oral Health Data Bank and WHO Oral Health Country/Area Profile Programme, 2000
Sunday, April 16, 2017
Final Paper and Presentation
This week I started to write the introduction to my research paper about cementation methods of zirconia. I will be sending drafts to Dr. Kramer to revise. I am using the sample papers as well as other dental journals as a guide for content and langue. I also made all of the slides that I will use for my final presentation on May 6th. Going through everything I have learned has been really exciting. I am really looking forward to sharing all of my knowledge about dental restorations with the audience. I think once I begin to practice my whole presentation I will have to cut parts out in order to stay within the time limits, which will be so difficult because I think all of it is so interesting and deserves to be mentioned in detail! Looking back, I have had so much fun with this project and am anticipating the outcome of all my hard work.
Sunday, April 9, 2017
3D Printing in Dentistry
Last week Dr. Kramer went to a dental convention and bought back a couple neat sources talking about how 3D printing is being utilized to make restorations. This is an extremely new field that does not have much research behind it. However, here is a little bit about how 3D printing is emerging in dentistry.
Ceramic 3D printing uses resin-based systems mainly for small, high quality elements. The printed material is a sinterable ceramic powder mixed with photo curable resin. Small portions of this technology, like the alumnia parts, helped make the parts on Mars rover Curiosity. Below is a picture of the kinds of restorations 3D printers can make.
3D printing is in fact different than CAD/CAM technology that I have talked about before. In CAD/CAM technology you begin with making the lithium disilicate or zirconia into blocks, then the material is milled and crystallized. 3D printing begins with making the resin material, printing the restoration then crystallizing it.
3D printed restorations will certainly grow and have more research conducted on their effectiveness in the field, especially as restorations move away from metal and into a ceramic dominated industry.
Ceramic 3D printing uses resin-based systems mainly for small, high quality elements. The printed material is a sinterable ceramic powder mixed with photo curable resin. Small portions of this technology, like the alumnia parts, helped make the parts on Mars rover Curiosity. Below is a picture of the kinds of restorations 3D printers can make.
 |
| Models of 3D printed restorations |
 |
| 3D print (bottom) vs CAD/CAM (top) technology |
3D printed restorations will certainly grow and have more research conducted on their effectiveness in the field, especially as restorations move away from metal and into a ceramic dominated industry.
Saturday, April 8, 2017
Final Weeks of Senior Projects
Now that it is April I will be beginning to compile all of my data from the dental journals into the final format for my paper. I will also be beginning my paper, with the guidance of Dr. Kramer and possibly the new chemistry teacher at BASIS who has a background in dentistry. I am excited to start the process and continue learning about dentistry and how higher level research is completed as well as communicated with the community. I might have a few more shadow days with Dr. Shelley of Dr. Folson, however I want to keep focused on writing my final research paper. Some of my time will also be spent making my tri-fold poster, and power point presentation that I will be using to present my senior project on May 6th, as well as practicing. I cannot wait to write my final research paper. It will be so exciting to see the finished product! Stay tuned!
Sunday, April 2, 2017
Shadow Day with Dr. Folson
On Thursday I had the privilege to shadow Dr. Folson at his private practice. He specializes in periodontics and dental implant surgery. The concentration of periodontics focuses on the surrounding framework of the teeth. Before I begin describing the steps of the surgery, I must say that I had a fantastic day watching Dr. Folson work. He answered all of my questions very throughly and made sure that I was able to learn as much as I could. All of the staff were extremely welcoming and encouraging which I appreciated immensely.
 |
| Dental Drill |
 |
| Various Drill Heads |
Then Dr. Folson inserted the screw into the drilled socket shown in the image below.
 |
| Screw, abutment and crown |
Once he ensured that the fit was correct, he put a temporary cap on the screw while the implant heals. Implants can take months at a time to recover. Dr. Folson then used a bone graft in the surrounding portion of the implant before suturing the flap of gum he cut back into place. For the bone graft he used LifeNet mineralized bone granules shown below.
 |
| Mineralized Bone Granules |
For the sutures, Dr. Folson used PTFE sutures instead of black silk sutures because the surrounding tissue responds well and deters bacterial growth. These sutures can stay in a patients mouth for longer periods of time as well due to their biocompatibily.
 |
| PTFE suture |
Dr. Folson gave me a copy of the before and after X-rays of the implant.
 |
| Before is on the left After is on the right |
I learned so much observing the procedure and I had so much fun. Below is a picture of Dr. Folson, the patient and myself after the surgery.
 |
| A special thanks to Liz! |
Friday, March 31, 2017
Second Shadow Day with Dr. Shelley
Yesterday I was able to observe a fitting for an oral sleep appliance and more CEREC crown fittings. The crowns that I had seen previously were for decayed molars, however one patient on Wednesday needed a crown for the lateral incisor. Incisors are in the front which makes appearance even more important and have a very different shape than molars. The restoration also needed to fit onto a dental implant and abutment, which I will go into more detail about in my post tomorrow. This means that in order to create a crown with the CEREC, Dr. Shelley had to go through a few more steps.
Another interesting step Dr. Shelley had to take with this patient has to do with the color of the surrounding teeth. Since the incisor is in the front, appearance is very important. The patient had a very unique blue and gray coloring which was difficult to match with the standard palette that the lithium disilicate blocks that the office has. So, Dr. Shelley is sending the restorations to a lab that has an artist who will match the color of the crown much closer to that of the patient's surrounding teeth.
During the acquisition phase of the CEREC when the omnicam is mapping out the patients mouth for a crown over remaining natural tooth it would only need lower jaw, upper jaw and buccal views. Implants need a gingiva mask view as well in order for the computer to map it out correctly.
 |
| CEREC acquiring gingiva mask view of implant |
After the three-dimensional model of the mouth is made, the doctor places a screw and a plastic cap on the implant so the computer software will recognize the cap and design a crown to go over it. The doctor can then change the contact and anatomy of the abutment and crown before milling it out. I thought it would be interesting to post a short video of the crown being milled out of the lithium disilicate block in the chamber. In the video below the milling machine has just begun to mill out the crown from the block.
Another interesting step Dr. Shelley had to take with this patient has to do with the color of the surrounding teeth. Since the incisor is in the front, appearance is very important. The patient had a very unique blue and gray coloring which was difficult to match with the standard palette that the lithium disilicate blocks that the office has. So, Dr. Shelley is sending the restorations to a lab that has an artist who will match the color of the crown much closer to that of the patient's surrounding teeth.
Friday, March 24, 2017
CAD/CAM Technology
CAD/CAM stands for computer-aided design/ computer-aided manufacturing. This technology is revolutionizing dental restrains because the overall process is more efficient for the dentist and the patient. On the down side, this technology is expensive, costing upwards of $100,000. Not to mention the expense to purchase blocks of crown material in a variety of different shades. However, its chair-side convenience makes it worth the price for dentists and patients.
The specific machine that Arrowhead Lakes Dentistry owns is called the CEREC (Chairside Economical Restoration of Esthetic Ceramics). When a patient comes in needing a crown the dentist will first clean up the tooth, which is basically cleaning up the decayed or broken parts of the tooth. Next the dentist will use the CEREC omnicam to scan the patient's mouth around the problem tooth.
The scan takes continuous photos and strings them together based on the background so it can create an accurate three-dimensional image on the computer pictured below. The dentist will continue scanning the area until the computer has gathered enough pictures to complete the three-demential replica of the patient's mouth. The dentist needs to complete this process three times for each of the sides of the tooth; the lingual, occlusal and facial surfaces.
Once the model of the patient's mouth is complete the computer software creates a crown and fits it onto the problem tooth. The dentist can then manually adjust how the crown will contact neighboring teeth on all three surfaces. As pictured below, the image will have highlighted areas of the crown with corresponding colors for how much contact there will be.
Once the dentist is satisfied, the computer sends the image of the crown to the milling unit where the crown will physically be made. In the picture below, the milling chamber is the center panel.
A block of zirconia or lithium disilicate is placed inside and then milled into the shape of the crown using diamond infused drills and a lubricant substance.
It takes about 12-15 minutes for the crown to be shaped, depending on the complexity of the tooth shape. After the crown is milled, the dentist will do a preliminary fitting with the patient to ensure that it is the correct size. Then the crown goes into an oven so it can achieve its maximum strength. During this process lithium disilicate looses its purple color and becomes a shade that mimics a natural tooth. The crown is in the oven for about 12 minutes at more 575 degrees celsius.
Once the crown has cooled the dentist can permanently cement the crown into the patient's mouth and the procedure is completed.
The specific machine that Arrowhead Lakes Dentistry owns is called the CEREC (Chairside Economical Restoration of Esthetic Ceramics). When a patient comes in needing a crown the dentist will first clean up the tooth, which is basically cleaning up the decayed or broken parts of the tooth. Next the dentist will use the CEREC omnicam to scan the patient's mouth around the problem tooth.
 |
| CEREC Omnicam |
The scan takes continuous photos and strings them together based on the background so it can create an accurate three-dimensional image on the computer pictured below. The dentist will continue scanning the area until the computer has gathered enough pictures to complete the three-demential replica of the patient's mouth. The dentist needs to complete this process three times for each of the sides of the tooth; the lingual, occlusal and facial surfaces.
 |
| Lingual is the inside surface Occlusal is the top surface Facial is the outside surface |
 |
| CEREC computer unit |
 |
| CEREC milling unit |
A block of zirconia or lithium disilicate is placed inside and then milled into the shape of the crown using diamond infused drills and a lubricant substance.
 |
| Unmilled blocks of lithium disilicate |
 |
| Zoomed in photo of a crown being milled |
 |
| CEREC oven |
Wednesday, March 22, 2017
Shadow Day with Dr. Shelley and Dr. Fellner
Today I shadowed at Arrowhead Lakes Dentistry, which is conveniently right down the road from Midwestern University. I began the day observing Dr. Shelley's patients. He had a variety of different appointments scheduled such as consultations, cavity fillings, crown work and routine checkups. The first patient need cavities filled on the left mandibular cuspid (for reference I included a diagram with corresponding names below). Dr. Shelley administered two shots to numb the left side of the patient's mouth before beginning removing the decay from the tooth. Then Dr. Shelley primed the surface, where the decay used to be, and added a bonding agent before filling the space with composite resin. The resin was then light cured in order to harden. Dr. Shelley smoothed the surface to the point where the patient felt no rough surfaces. The next patient had a failed crown on the left mandibular 3rd molar. Usually this means the integrity of the crown or the cement was compromised rather than the natural tooth itself allowing for an easy re-cementation procedure to permanently fix the problem. However, this patient only had a minimal amount of natural tooth left because the rest was still cemented inside the crown. Eventually the patient will need a root canal, but due to the patient's current dental condition Dr. Shelley decided it would be more beneficial for the patient to have the crown re-cemented even though the failure probability is high. He hopes it will provide some function between now and the scheduled appointment for the root canal, which is the permanent solution. The really interesting procedure I witnessed today was with Dr. Fellner because he used the CAD/CAM technology to fit a crown. In a later post I will go into a more in depth description on how the CAD/CAM works, but essentially it allows for the dentist to upload a three-dimensional diagram of the patient's mouth onto a computer equipped with software that can fit a crown for the problem tooth. The doctor can then make additional adjustment to the computer's suggestion. To get the actual crown the three-dimensional image is sent to the milling machine that takes a block of zirconia or lithium disilicate and shapes it to match the exact image created on the computer. After manually fitting the crown and making any additional adjustment it is baked in an oven to reach its maximum strength, then cemented into the patient's mouth. Typically, a crown fitting would take about a week and two different appointments because the initial mold would have to be taken and sent to a lab that has the capacities to make the crown, while the dentist fit the patient with a temporary crown in the mean time, then once the permanent crown comes in the dentist must remove the temporary crown and cement the permanent one. This is why the CAD/CAM technology is so fantastic! It can all be completed in one appointment with less moving parts. Overall, it was a really fun day and I learned so much about CAD/CAM technology in private practice.
 |
| Diagram of the Human Mouth |
Sunday, March 12, 2017
Week 5
This week I met with Dr. Kramer and set a meeting for next Tuesday to exchange the sources he had access to in Midwestern's library. I am really excited to continue working on my chart and filling in all the blank spaces. We also went over what each of the categories meant again and key words to look for to make it easier to pick out the information that I need specifically for my chart. A few weeks ago I met another dentist who said he would love to have me shadow. His name is Dr. Folson and he specializes in periodontics and implants. I have already scheduled a time to shadow him next Thursday and I am so excited. I cannot wait to learn about dental implant surgery.
Tuesday, March 7, 2017
The Layers of a Restoration
Today when I met with Dr. Kramer we went over all of the general steps that have to be completed in order for a dental restoration to be successful. He a drew diagram for me so I could better understand how everything worked together as well as how those steps should be categorized into my chart for my research, so I thought I should share it.
The first layer is the crown, in this case it is zirconia, which would already be polished, shaped and fitted for the patients mouth before it is cemented. The next layer is the intaglio surface, the interior area of the zirconia crown. Part of my research is finding the most accepted and successful method to prepare the intaglio because at the moment there are a variety of approaches. Next, there is an optional step, the intaglio primer, which is typically a substance with a phosphate group base that enhances bonding with the surrounding layers. After is the cement which is the main bonding factor of the restoration. As I explained in a previous post "Cement Types", there are different types of cements which can change whether or not an the next layer, an etch layer, exists. For example, if a self-etching resin cement is used, then there is no need to etch the surface again. The final surface is the prepared tooth, or natural tooth. There are several ways to prepare the natural tooth for a restoration, which is why I am also researching the best protocol for preparing the natural tooth.
The first layer is the crown, in this case it is zirconia, which would already be polished, shaped and fitted for the patients mouth before it is cemented. The next layer is the intaglio surface, the interior area of the zirconia crown. Part of my research is finding the most accepted and successful method to prepare the intaglio because at the moment there are a variety of approaches. Next, there is an optional step, the intaglio primer, which is typically a substance with a phosphate group base that enhances bonding with the surrounding layers. After is the cement which is the main bonding factor of the restoration. As I explained in a previous post "Cement Types", there are different types of cements which can change whether or not an the next layer, an etch layer, exists. For example, if a self-etching resin cement is used, then there is no need to etch the surface again. The final surface is the prepared tooth, or natural tooth. There are several ways to prepare the natural tooth for a restoration, which is why I am also researching the best protocol for preparing the natural tooth.
 |
| Top layer: Zirconia crown Top blue layer: Intaglio surface Green layer: Intaglio primer Middle white layer: Cement Pink layer: Etch Bottom blue layer: Prepared tooth |
Friday, March 3, 2017
Week 4
Last week I mentioned I would be making a chart that would organize my sources in order to make analyzing and comparing them easier. While it is still a work in progress, I have provided the link below to my Google sheet for anyone who is interested. For many of the sources, I have to wait for my next meeting with Dr. Kramer so I can get access to the full article for information like how the intaglio surface was prepared or what kind of etch was used. However, the abstracts of the articles do provide some of important information that I can use for my chart like what type of zirconia was used and what the results of the experiment were. I cannot wait to go over my chart with Dr. Kramer!
https://docs.google.com/spreadsheets/d/1UgR6Zo6ekmxPgEy_mbgAeCdgbhPnZg_dtK_bfNbEzko/edit?usp=sharing
https://docs.google.com/spreadsheets/d/1UgR6Zo6ekmxPgEy_mbgAeCdgbhPnZg_dtK_bfNbEzko/edit?usp=sharing
Wednesday, March 1, 2017
New Vocabulary
As I have read through dental journals, I have often had to look up specific terms and phrases that I did not understand. I would like to share the definitions of some because they may show up in my blog and it would be helpful to have something to reference.
A systematic review is a literature review that compiles and studies various research papers. A meta-analysis is a statistical procedure for combining data from multiple studies. The difference between them is that systematic review answers a defined research question that summarizes all empirical evidence while meta-analysis is a statistical method to summarize results of studies.
In vitro means the study or experiment was done in a controlled environment outside of a living organism while in vivo, which means "within the living", is a study or experiment preformed using the whole organism.
A few abbreviations I had to get used to include: CAD/CAM, which is computer-aided design/computer-aided manufacturing and FPD, which means fixed partial denture.
More definitions to come!
Sunday, February 26, 2017
Cement Types
There are four types of dental cements: glass ionomer (GI) cements, resin-modified glass ionomer (RMGI) cements, resin cements, and self-etching resin cements. While the action "cementing" might sound permanent it is actually important that the dentist is able to remove the restoration if needed during the treatment of the patient. Yet, of course, it still must be strong enough to stay in the patients the mouth. Requirements other than retention that are considered include durability, seal and neatness (during application as well as preparation).Cements will never make up for lack of proper preparation of a dental restoration.
GI cement is primarily used in PFM and metallic restorations. It has thin film thickness, can cause some remineralization to the demineralized tooth structure due to fluoride release and retains moisture.

RMGI cement is very similar to GI cement, the only difference is that RMGI cement is not soluble in other oral fluids. While it has been used successfully on most types of restorations it is most commonly used in PFM, metallic restorations or any situation where moisture-control is problematic.

Resin cement creates a micro-mechanical bond to the natural tooth on one side and the restoration on the other. The preparation for resin cement includes pretreatment of the tooth with 37% phosphoric acid and a dentin bonding agent. All-ceramic restorations are mainly cemented with resin cement.

Self-etching resin cement does not need the pretreatment that resin cement needs. It is one of the most versatile being able to cement zirconia, lithium disilicate, metallic, all-ceramic, and PFM restoration materials.

GI cement is primarily used in PFM and metallic restorations. It has thin film thickness, can cause some remineralization to the demineralized tooth structure due to fluoride release and retains moisture.
RMGI cement is very similar to GI cement, the only difference is that RMGI cement is not soluble in other oral fluids. While it has been used successfully on most types of restorations it is most commonly used in PFM, metallic restorations or any situation where moisture-control is problematic.
Resin cement creates a micro-mechanical bond to the natural tooth on one side and the restoration on the other. The preparation for resin cement includes pretreatment of the tooth with 37% phosphoric acid and a dentin bonding agent. All-ceramic restorations are mainly cemented with resin cement.

Self-etching resin cement does not need the pretreatment that resin cement needs. It is one of the most versatile being able to cement zirconia, lithium disilicate, metallic, all-ceramic, and PFM restoration materials.

Friday, February 24, 2017
Week 3
Yesterday I had my initial reference collection review with Dr. Kramer. It went very well. I found some sources that will really help with my final paper. My next task is to organize my sources into a chart using the date the article was written, what type of zirconia it mentions, how the intaglio surface is prepared, what intaglio primer is used, what cement type and brand is used, what methods of tooth surface preparation is used (total etch, selective etch, or self etch), and what the result is. The intaglio surface and primer are two layers that are essential to the overall success of the crown. If you think of the crown as different layers the zirconia would be on the top, then the intaglio surface, the intaglio primer, the cement, the primer for the natural tooth and finally the natural tooth on the bottom. Not only did we talk about my sources and next steps for my project, we also finalized my initial abstract. He had some great tips to help my abstract sound more professional. I will be continuing to search for sources to categorize. Stay tuned!
Friday, February 17, 2017
Chemistry and Dentistry
I chose Mr. Caniglia as my BASIS faculty supervisor because I took his organic chemistry capstone class this year. As I find out more about the "what" of dentistry I want to have Mr. Caniglia help me with figuring out the "why". For example I learned that zirconia and lithium disilicate undergo different crystalline structures based on what part of the crown-making process the crown is at. During the phase that the crown must be shaped zirconia and lithium disilicate take on different color and are more malleable, but after the final firing stage they loose that color and the crystalline structure becomes fully hardened. Mr. Caniglia and I are working on using my basic knowledge of organic and inorganic chemistry to help me understand the reason why this happens. Another topic of interest is in the properties that make porcelain, zirconia and lithium disilicate match the color and translucency of human teeth so well. Check back for more updates!
Thursday, February 16, 2017
What are crowns?
When a tooth has decay, a filling is a technique that can reestablish the normal function and shape of the tooth. Materials used for fillings include gold, porcelain, a composite resin and an amalgam. If a filling can no longer salvage a tooth because the decay is too invasive, then a crown, also known as cap, is used. Cracked teeth are held together by crowns as well. Crowns are also utilized when a tooth is discolored or misshapen. Crowns are fit on top of the metal parts of root canal implants or whatever remains of the patient’s original tooth. Dental bridges are another way crowns are helpful. They anchor either side of a dental bridge that is meant to fill a gap made by a missing tooth. Here are a few different types.
Gold is one of the best materials for a crown because it is long lasting and durable, however it is easier to see in the mouth which deters some patients from choosing it.
 |
| Gold crown |
Porcelain fused to metal (PFM) crowns are aesthetically pleasing, long-lasting, accommodate the shape of the tooth well and are inexpensive. Disadvantages to PFM crowns include the dark line that appears where the crown meets the tooth near the gum line and more of the original tooth needs to be removed to fit the crown.
 |
| PFM crowns |
All-porcelain or all ceramic crowns do not show a dark line, match other teeth extremely well, are non-allergenic and can be performed in one appointment. Though, these crowns are fragile, cause teeth sensitivity, tricky to fit, need more of the original tooth reduced and are more expensive than PFM crowns.
 |
| All-porcelain crowns |
Zirconia crowns resemble natural teeth well, rarely are rejected by the mouth, are fairly durable and do not need as much of the original tooth removed to fit.
 |
| Zirconia crowns |
Lithium disilicate crowns have low fracture rates, resemble natural teeth well and are easily shaped.
 |
| Lithium disilicate crowns |
Week 2
On Monday I met with Dr. Kramer and we went over the sources I have been using for my information on the six different crown materials. My new task is to find articles that specifically deal with cementing protocols for zirconia and lithium distillate crowns. To aid my research and enhance my understanding of what a research paper at this level reads like, Dr. Kramer gave me a sample paper on dental materials that a student wrote for his class along with a large packet of sources that I can sort through. Tomorrow I am going to set up a dropbox so I can communicate with him easier as I start writing and come across certain sources that I think could be beneficial to my research. We set a goal for next Thursday to have an initial reference collection review, where we will share our narrowed down sources and talk about the sections in each that have relevant data to use. Dr. Kramer also gave me the number of a dentist who has a practice right down the street from Midwestern. This dentist owns a CAD/CAM that helps design the crowns right there in the office. This will be a great opportunity for me to shadow him to see the zirconia and lithium disilicate crowns being used first hand. I have had a great second week!
Monday, February 13, 2017
Introduction
WELCOME
Hello, my name is Sydney Miller and for my senior project I will be researching the optimal bonding protocol for zirconia and lithium disilicate crowns. My mentor is Dr. Robert Kramer, who is an assistant professor and preclinical leader at Midwestern University's College of Dental Medicine. I will be on campus Mondays, Wednesdays and Fridays each week.
My first week was extremely exciting. On Monday, Dr. Kramer gave me a tour of Glendale Hall, which is the hub of the dental school and where I will spend most of my time. From the work stations, where the dental students practice their techniques on mannequins, to the laboratories, the facilities are amazing. I had the honor of meeting and chatting with some of Dr. Kramer's brilliant friendly colleagues throughout my tour as well. Finally the tour ended in his office and we talked about our plan for my project moving forward. He wanted me to bring in my materials and sources I had used for my background research so he could further narrow my broad topic of "dental crowns". When I came back Wednesday he explained that it is important to understand the chemistry, physical properties, manufacture and synthesis of different crown materials. My task was to compile that information for each of the following types of crowns: zirconia, lithium disilicate, porcelain fused to metal (PFM), gold, leucite reinforced and zirconia lithium silicate. While I am still working to gather information on each material, it has tremendously helped my level of comprehension when reading dental journals and research papers. Studying the different crown materials has also helped me find solid sources that will contribute to my final paper.
I loved my first week at Midwestern. Interacting with Dr. Kramer inspires me to learn as much as I can about dentistry. Even though it is mostly reading dental journals with scientific language that at times goes over my head, I still enjoy every moment of it.
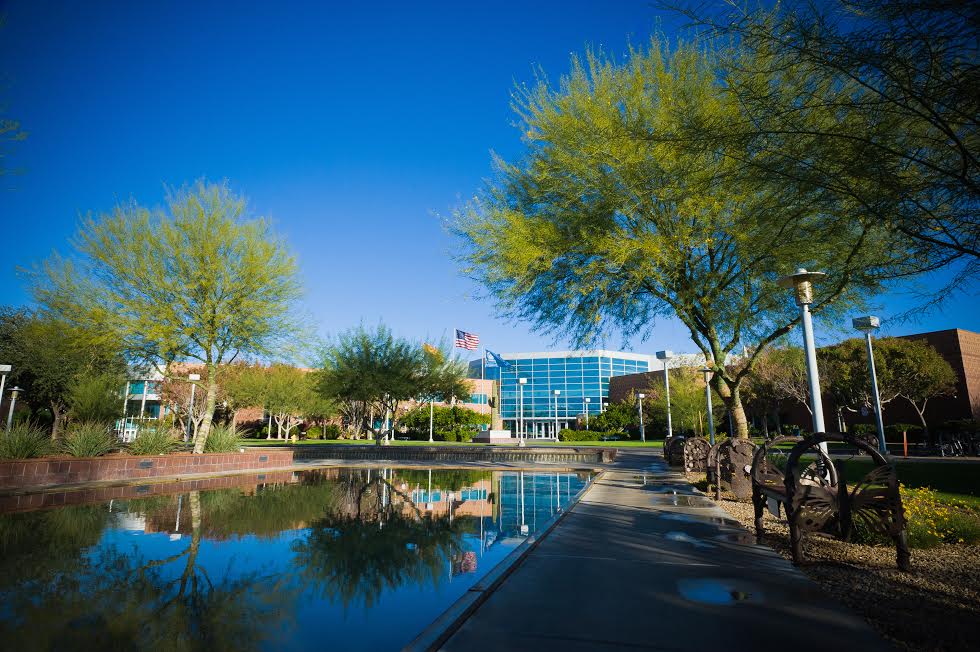 |
| Midwestern University-Glendale Campus |
Subscribe to:
Posts (Atom)